

How to Add an AI Chatbot to Your Website in Under 5 Minutes
Adding an AI chatbot to your website sounds technical. It's not.
If you can copy and paste, you can integrate a chatbot. The entire process takes less than 5 minutes, whether you use a website builder or a custom-coded site.
This guide walks you through the exact steps to get your chatbot live today.
What You Need Before Adding a Chatbot to Your Site
Before you integrate, make sure you have:
- A chatbot ready to deploy. Built, trained, and customized to match your brand.
- Access to your website's backend. You'll need to paste a small code snippet.
- 5 minutes. That's genuinely all it takes.
If you haven't created your chatbot yet, start with WeblyChat for free. Once your chatbot is designed and ready, come back here.
Step 1: Copy Your Chatbot Embed Code From WeblyChat
Every chatbot platform provides an embed code. It's a small snippet of JavaScript that makes your chatbot appear on your site.
In WeblyChat, here's how to get it:
- Log into your WeblyChat dashboard
- Select the chatbot you want to deploy
- Click "Add to Site"
- Copy the code snippet
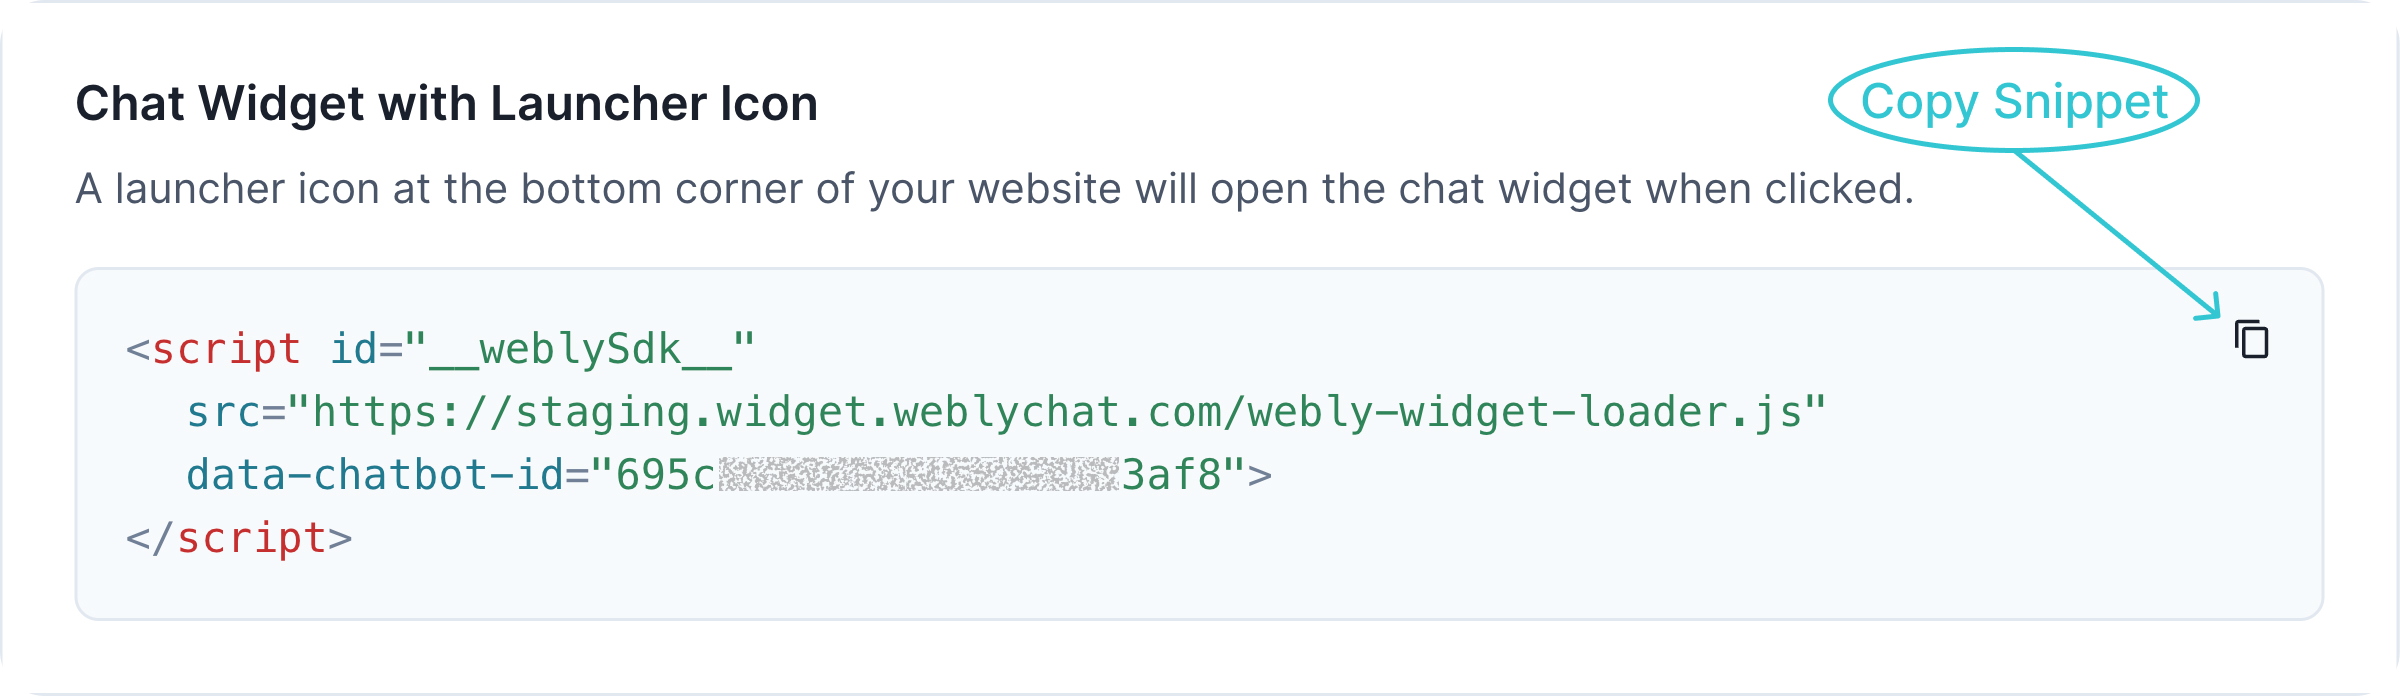
That's it. One click, one code. Keep this copied. You'll paste it in the next step.
Step 2: Paste the Chatbot Code Into Your Website
The concept is the same everywhere: paste the embed code into your site's body-end or footer section.
Adding a Chatbot to Wix, WordPress, Squarespace, or Shopify
Whether you're on Wix, WordPress, Squarespace, Shopify, or any other platform, the process is similar:
- Log into your website's dashboard
- Find the Custom Code or Code Injection section (usually under Settings or Advanced)
- Paste your embed code in the Body - end or Footer section
- Apply to All pages
- Save your changes
The exact menu names vary by platform, but every major website builder has a place to add custom code. Look for terms like "Custom Code," "Code Injection," "Header/Footer Scripts," or "Embed Code."
Need step-by-step instructions for your platform? We have detailed integration guides with screenshots for every major platform:
- How to Add a Chatbot to Wix
- How to Add a Chatbot to WordPress
- How to Add a Chatbot to Webflow
- How to Add a Chatbot to Shopify
- Squarespace guide coming soon
Adding a Chatbot to a Custom-Coded Website
If you built your site from scratch or use a custom CMS:
- Open your main HTML file (usually
index.htmlor your layout template) - Paste the embed code just before the closing
</body>tag - Save and upload the file
That's it. The chatbot will now appear on every page that uses that template.
Step 3: Test Your Chatbot and Troubleshoot Common Issues
After saving, open your website in a new browser tab. You should see the chatbot widget in the corner of your screen.
Quick troubleshooting:
- Chatbot not appearing? Clear your browser cache and refresh.
- Only showing on some pages? Make sure you selected "All pages" in your platform's settings.
- Code errors? Double-check you copied the entire snippet without missing any characters.
Send a test message to confirm everything works. If it responds correctly, you're live.
Why WeblyChat Is the Easiest Chatbot to Integrate
Most chatbot platforms follow a similar embed process. But WeblyChat is designed specifically for small businesses who don't have time to troubleshoot technical issues.
Here's what makes WeblyChat different:
- One universal code snippet. Works on any platform.
- Lightweight script. Won't slow down your site.
- No developer required. If you can paste text, you can integrate.
- Instant deployment. Changes go live immediately.
We built WeblyChat so you can focus on running your business, not debugging code.
What Your Chatbot Does After You Install It
Once your chatbot is live, it starts working immediately:
- Answers visitor questions 24/7. Even when you're asleep.
- Engages visitors and drives action. Answers questions, links to booking pages, and keeps visitors on your site longer.
- Trained on your website content. The chatbot knows your services, pricing, and FAQs from day one.
- Reduces your support load. Handles repetitive questions so you don't have to.
You can monitor conversations, add custom Q&As, and adjust your widget's look and behavior from your WeblyChat dashboard. No code changes needed.
Start Adding a Chatbot to Your Website Today
Chatbot integration isn't the hard part. The hard part is building a chatbot that actually helps your customers. WeblyChat handles both: create, customize, and deploy in one platform.
For platform-specific setup guides and advanced customization options, check out our documentation.


