How to Add a Chatbot to Your Webflow Website
To add a chatbot to Webflow, sign up for WeblyChat, enter your site URL to train the AI, then paste one code snippet into Webflow's Site Settings under Custom Code in the Footer Code section. After saving and publishing, the chatbot goes live in under 5 minutes and works on any Webflow site plan that supports custom code.
Here is the full Webflow chatbot integration walkthrough with every click explained, so you can follow along with both your WeblyChat and Webflow dashboards open.
1. Sign Up and Set Up Your Webflow Chatbot
Go to WeblyChat and create a free account. The first thing you will see is two fields:
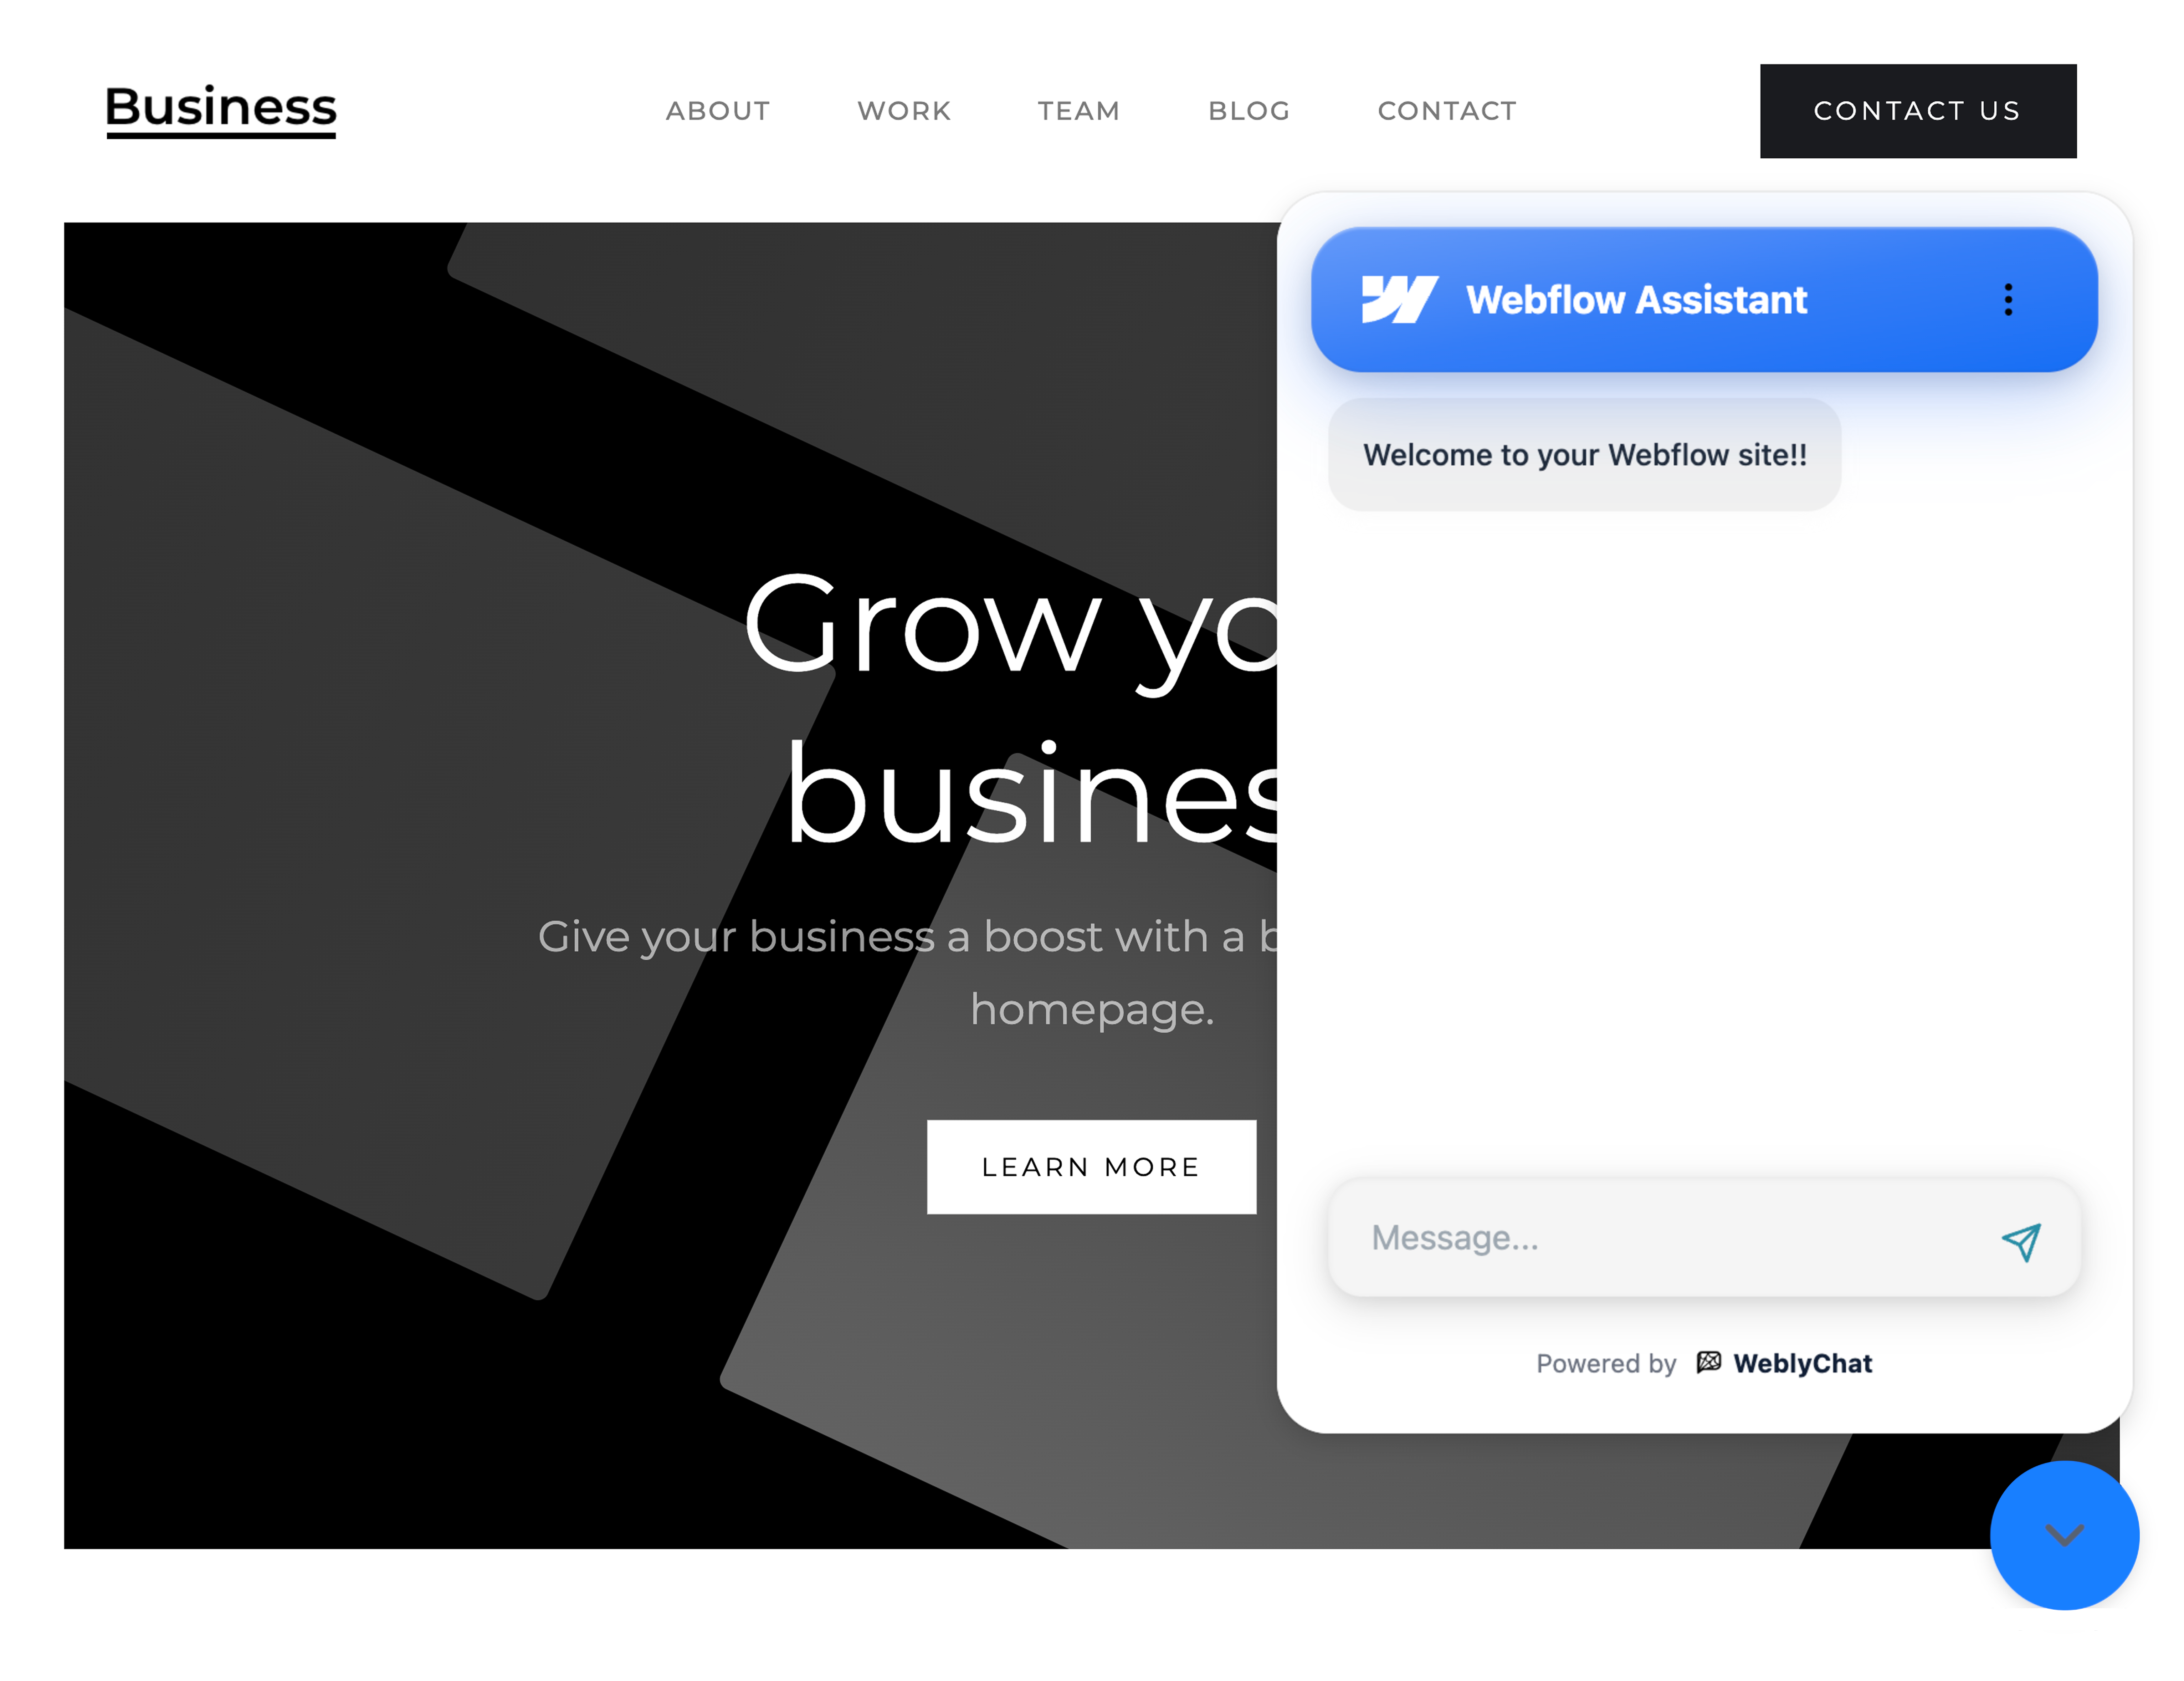
- Chatbot Name: This is what the chatbot responds as (e.g. "Webflow Assistant" or "Your Business Name Assistant"). Visitors will see this name in the chat header.
- Organization Name: The name of your business or organization. This helps the chatbot understand who it works for.
2. Add Your Webflow Site URL
Go to Sources and add your Webflow site URL. The AI will crawl your entire published site and train on your content: services, pricing, FAQs, about page, portfolio, case studies, and everything else published on your Webflow site. This is what makes your Webflow AI chatbot actually useful. It answers questions using your real content, not a generic script.
You can also upload files or add custom Q&As if you want the chatbot to know things that are not on your website, but the URL is the starting point.
3. Customize and Test Your Webflow AI Chatbot
Head to the Builder page to customize how your chatbot looks and behaves. You can match your brand colors and logo, write a welcome message, adjust the widget size and position, and more. The defaults work well out of the box, so you can always come back and fine-tune later.
The Builder page also includes a live preview where you can test your chatbot in real time. Ask it questions about your business to make sure it is answering correctly before you go live on your Webflow site.
4. Copy Your Embed Code
Go to Add to Site in the sidebar. You will see a single code snippet. Click the copy button. This is the only code you will ever need to paste.
5. Add the Code to Your Webflow Site
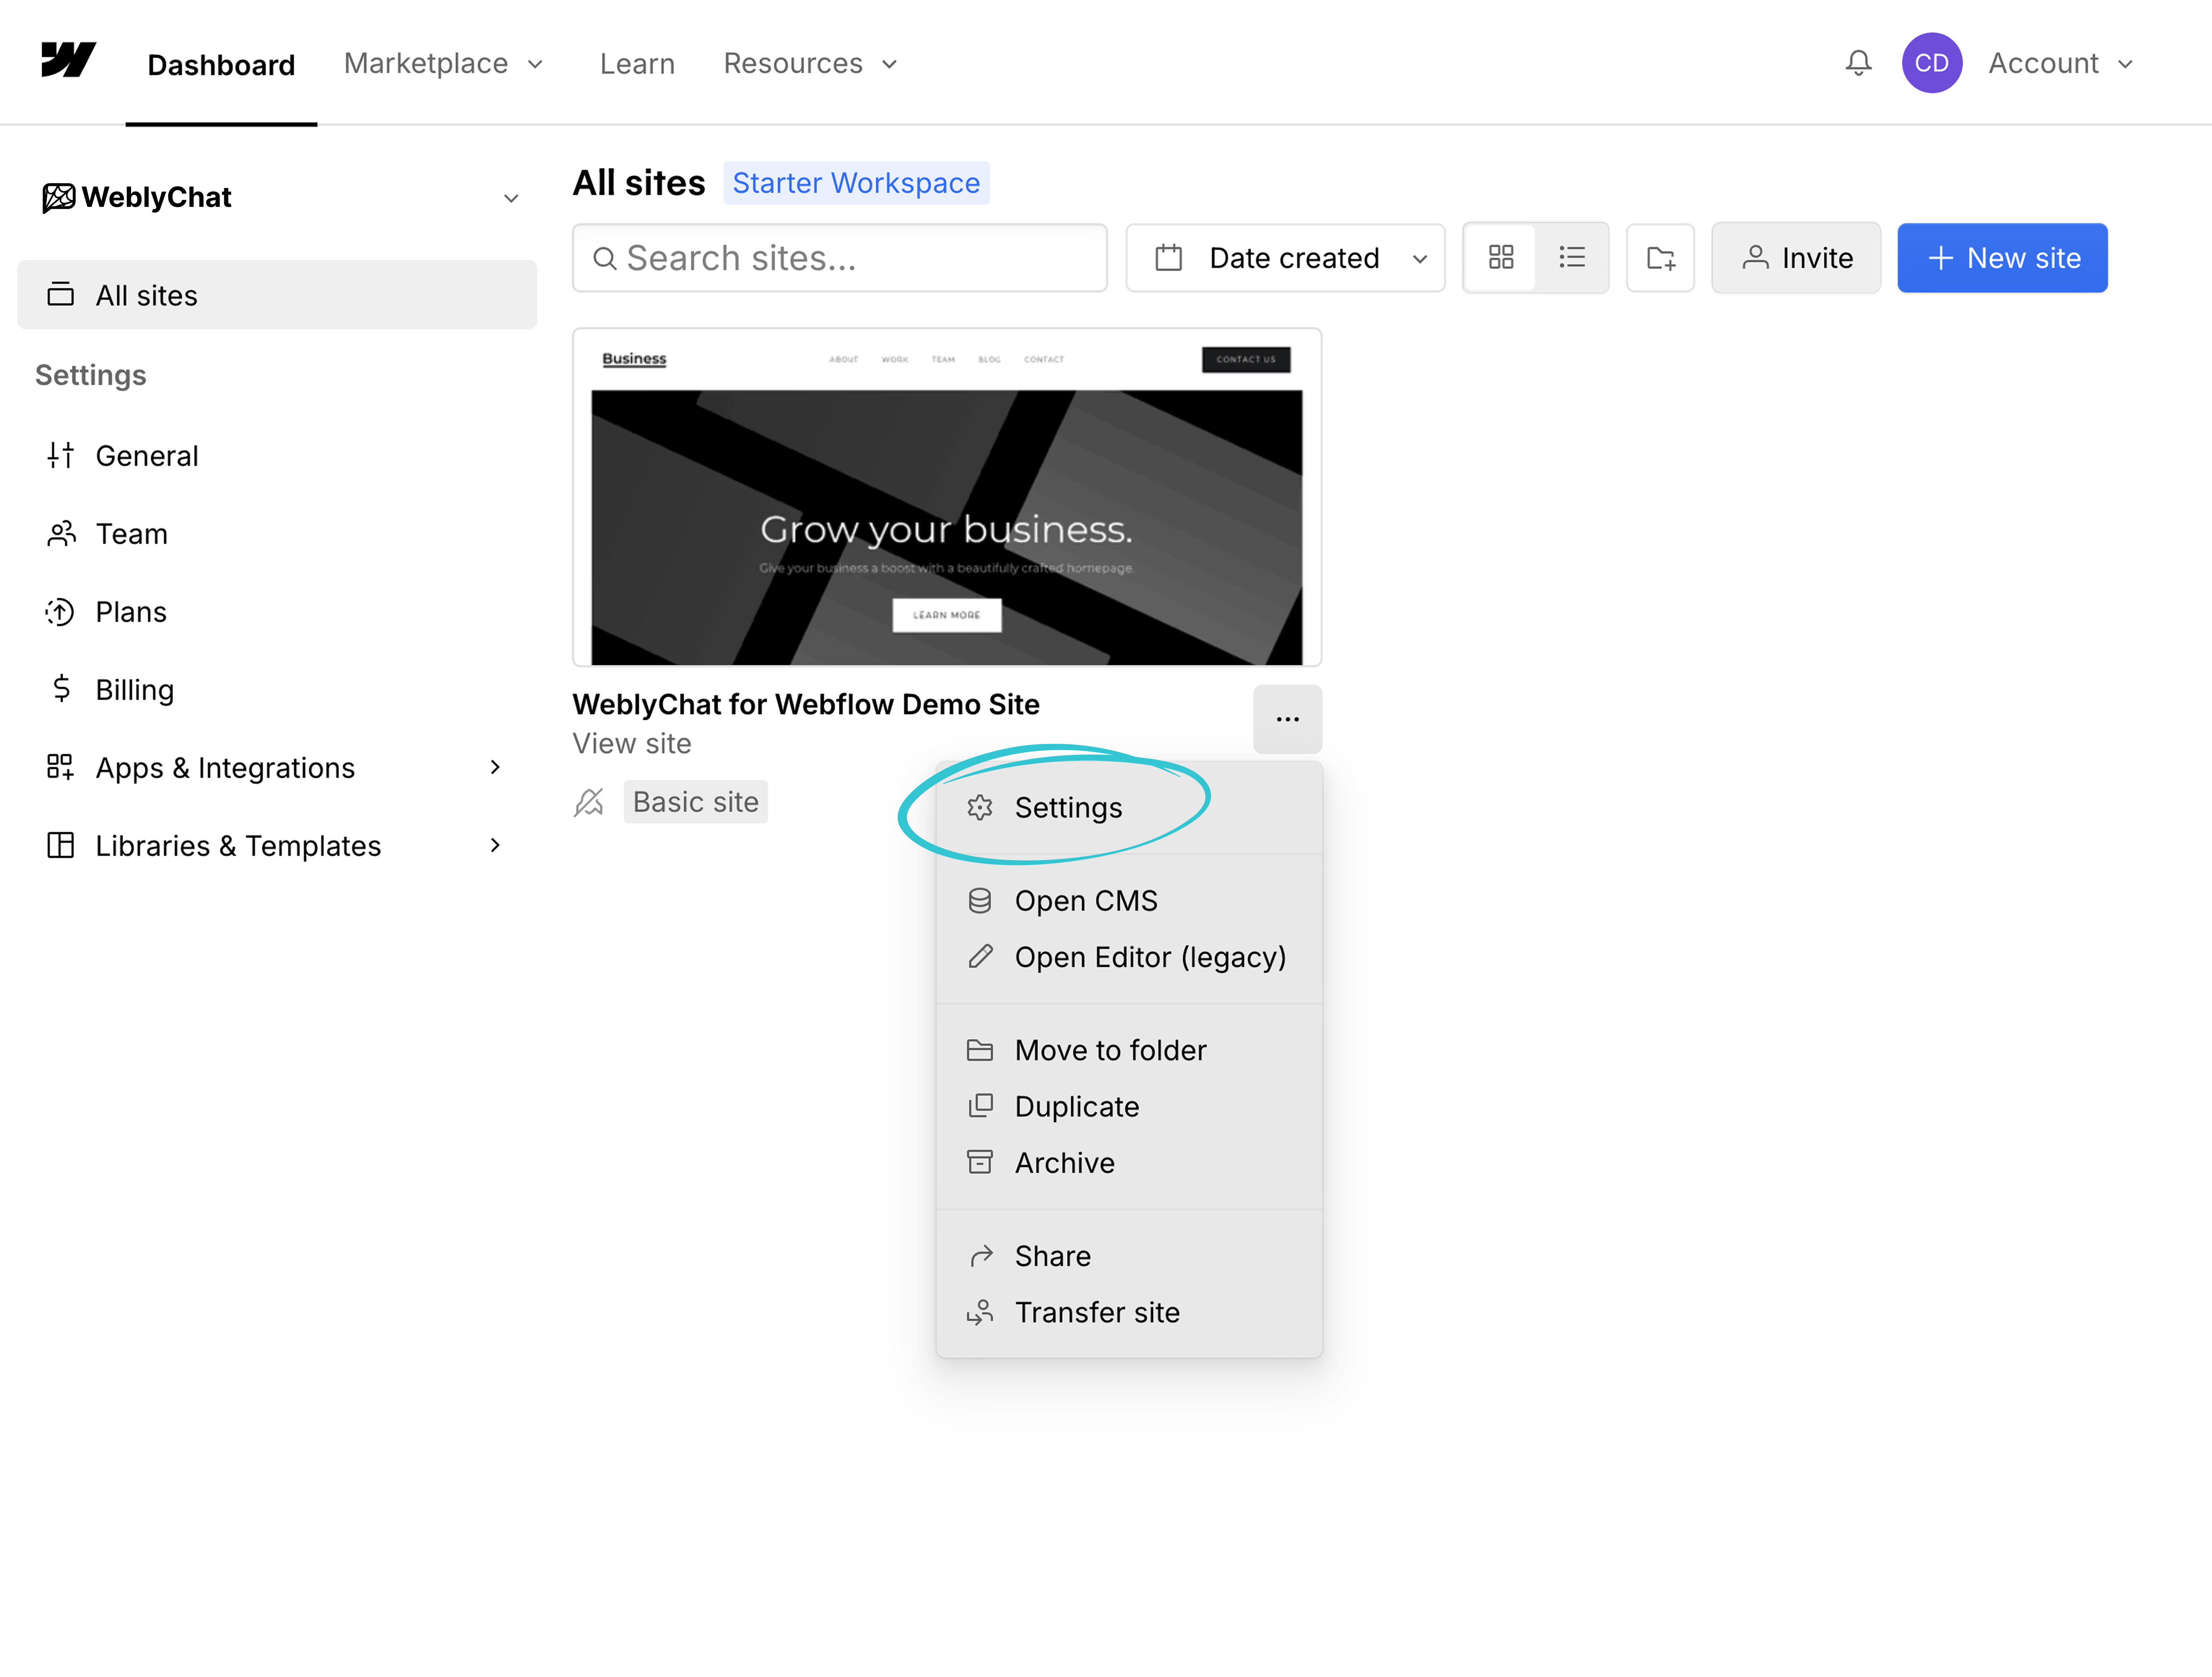
1. In your Webflow dashboard, find the site you want to add the chatbot to. Click the three-dot menu ("...") next to the site name on the site card.

2. Click Settings from the dropdown menu that appears.
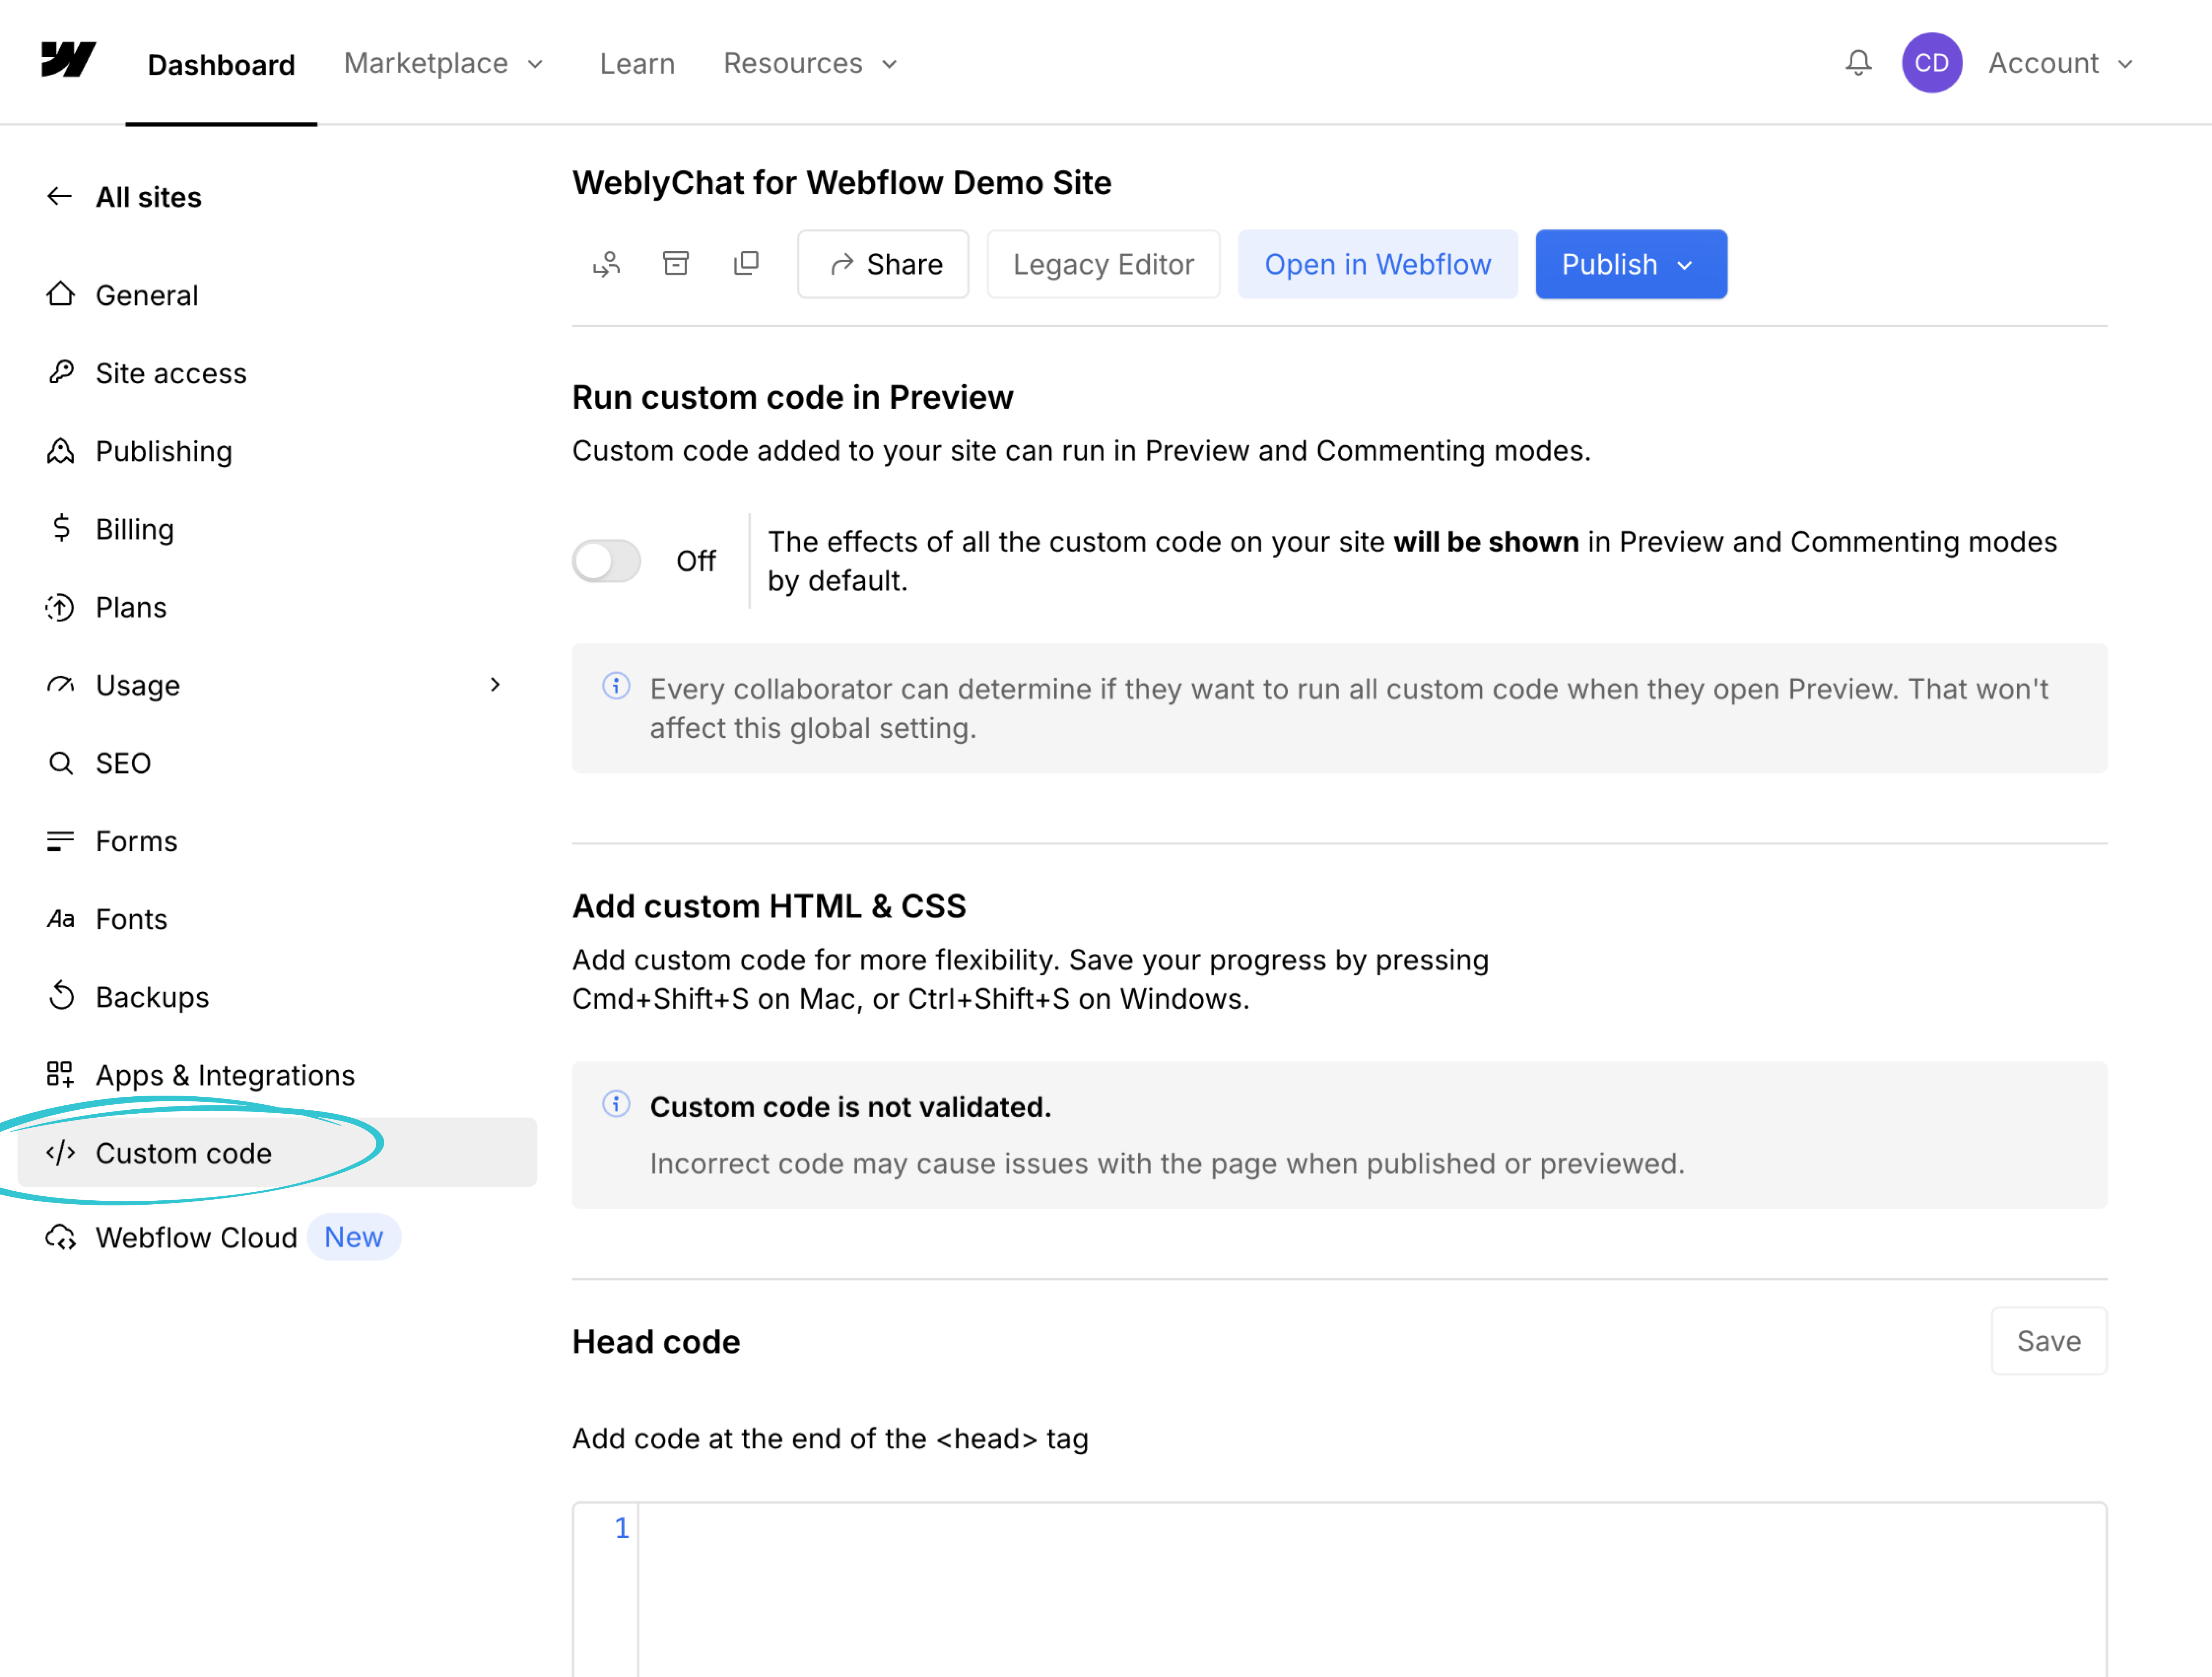
3. In the Site Settings sidebar, scroll down and click Custom Code.
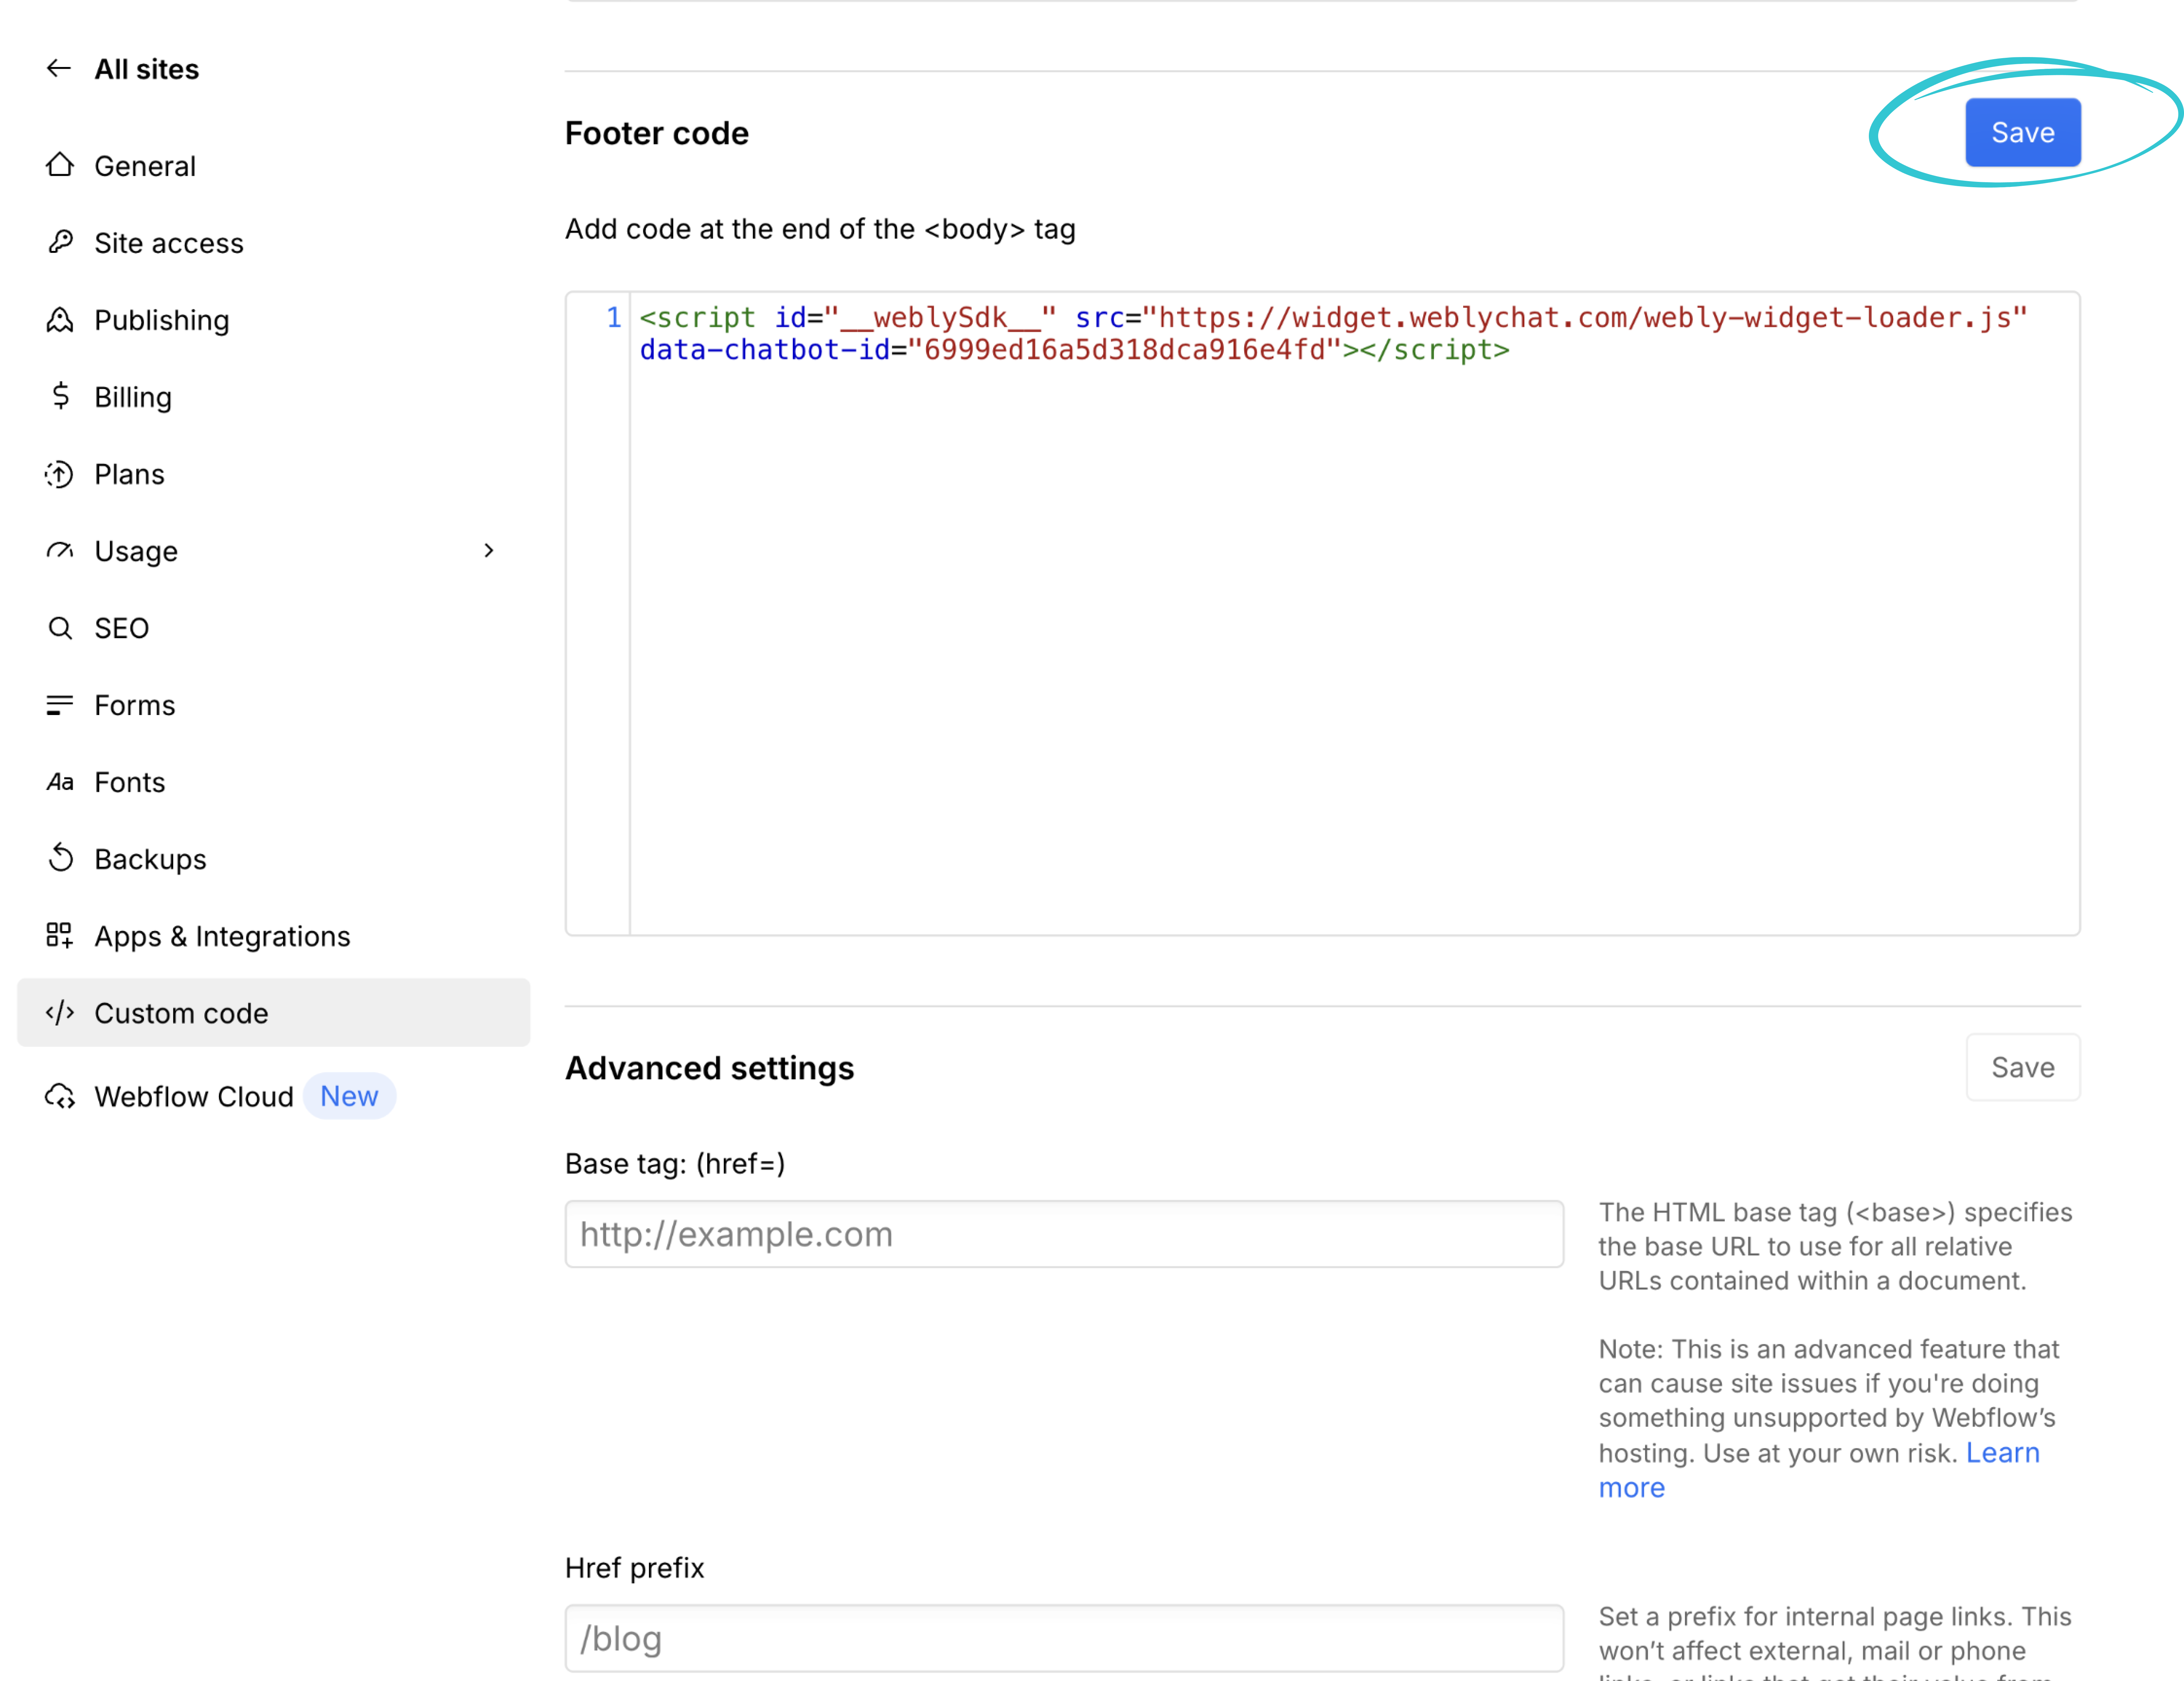
4. Scroll down to the Footer Code section. Paste your WeblyChat embed code into the text area. The Footer Code section adds your script to the end of the <body> tag on every page of your site, which is exactly where it needs to go. Then click Save.
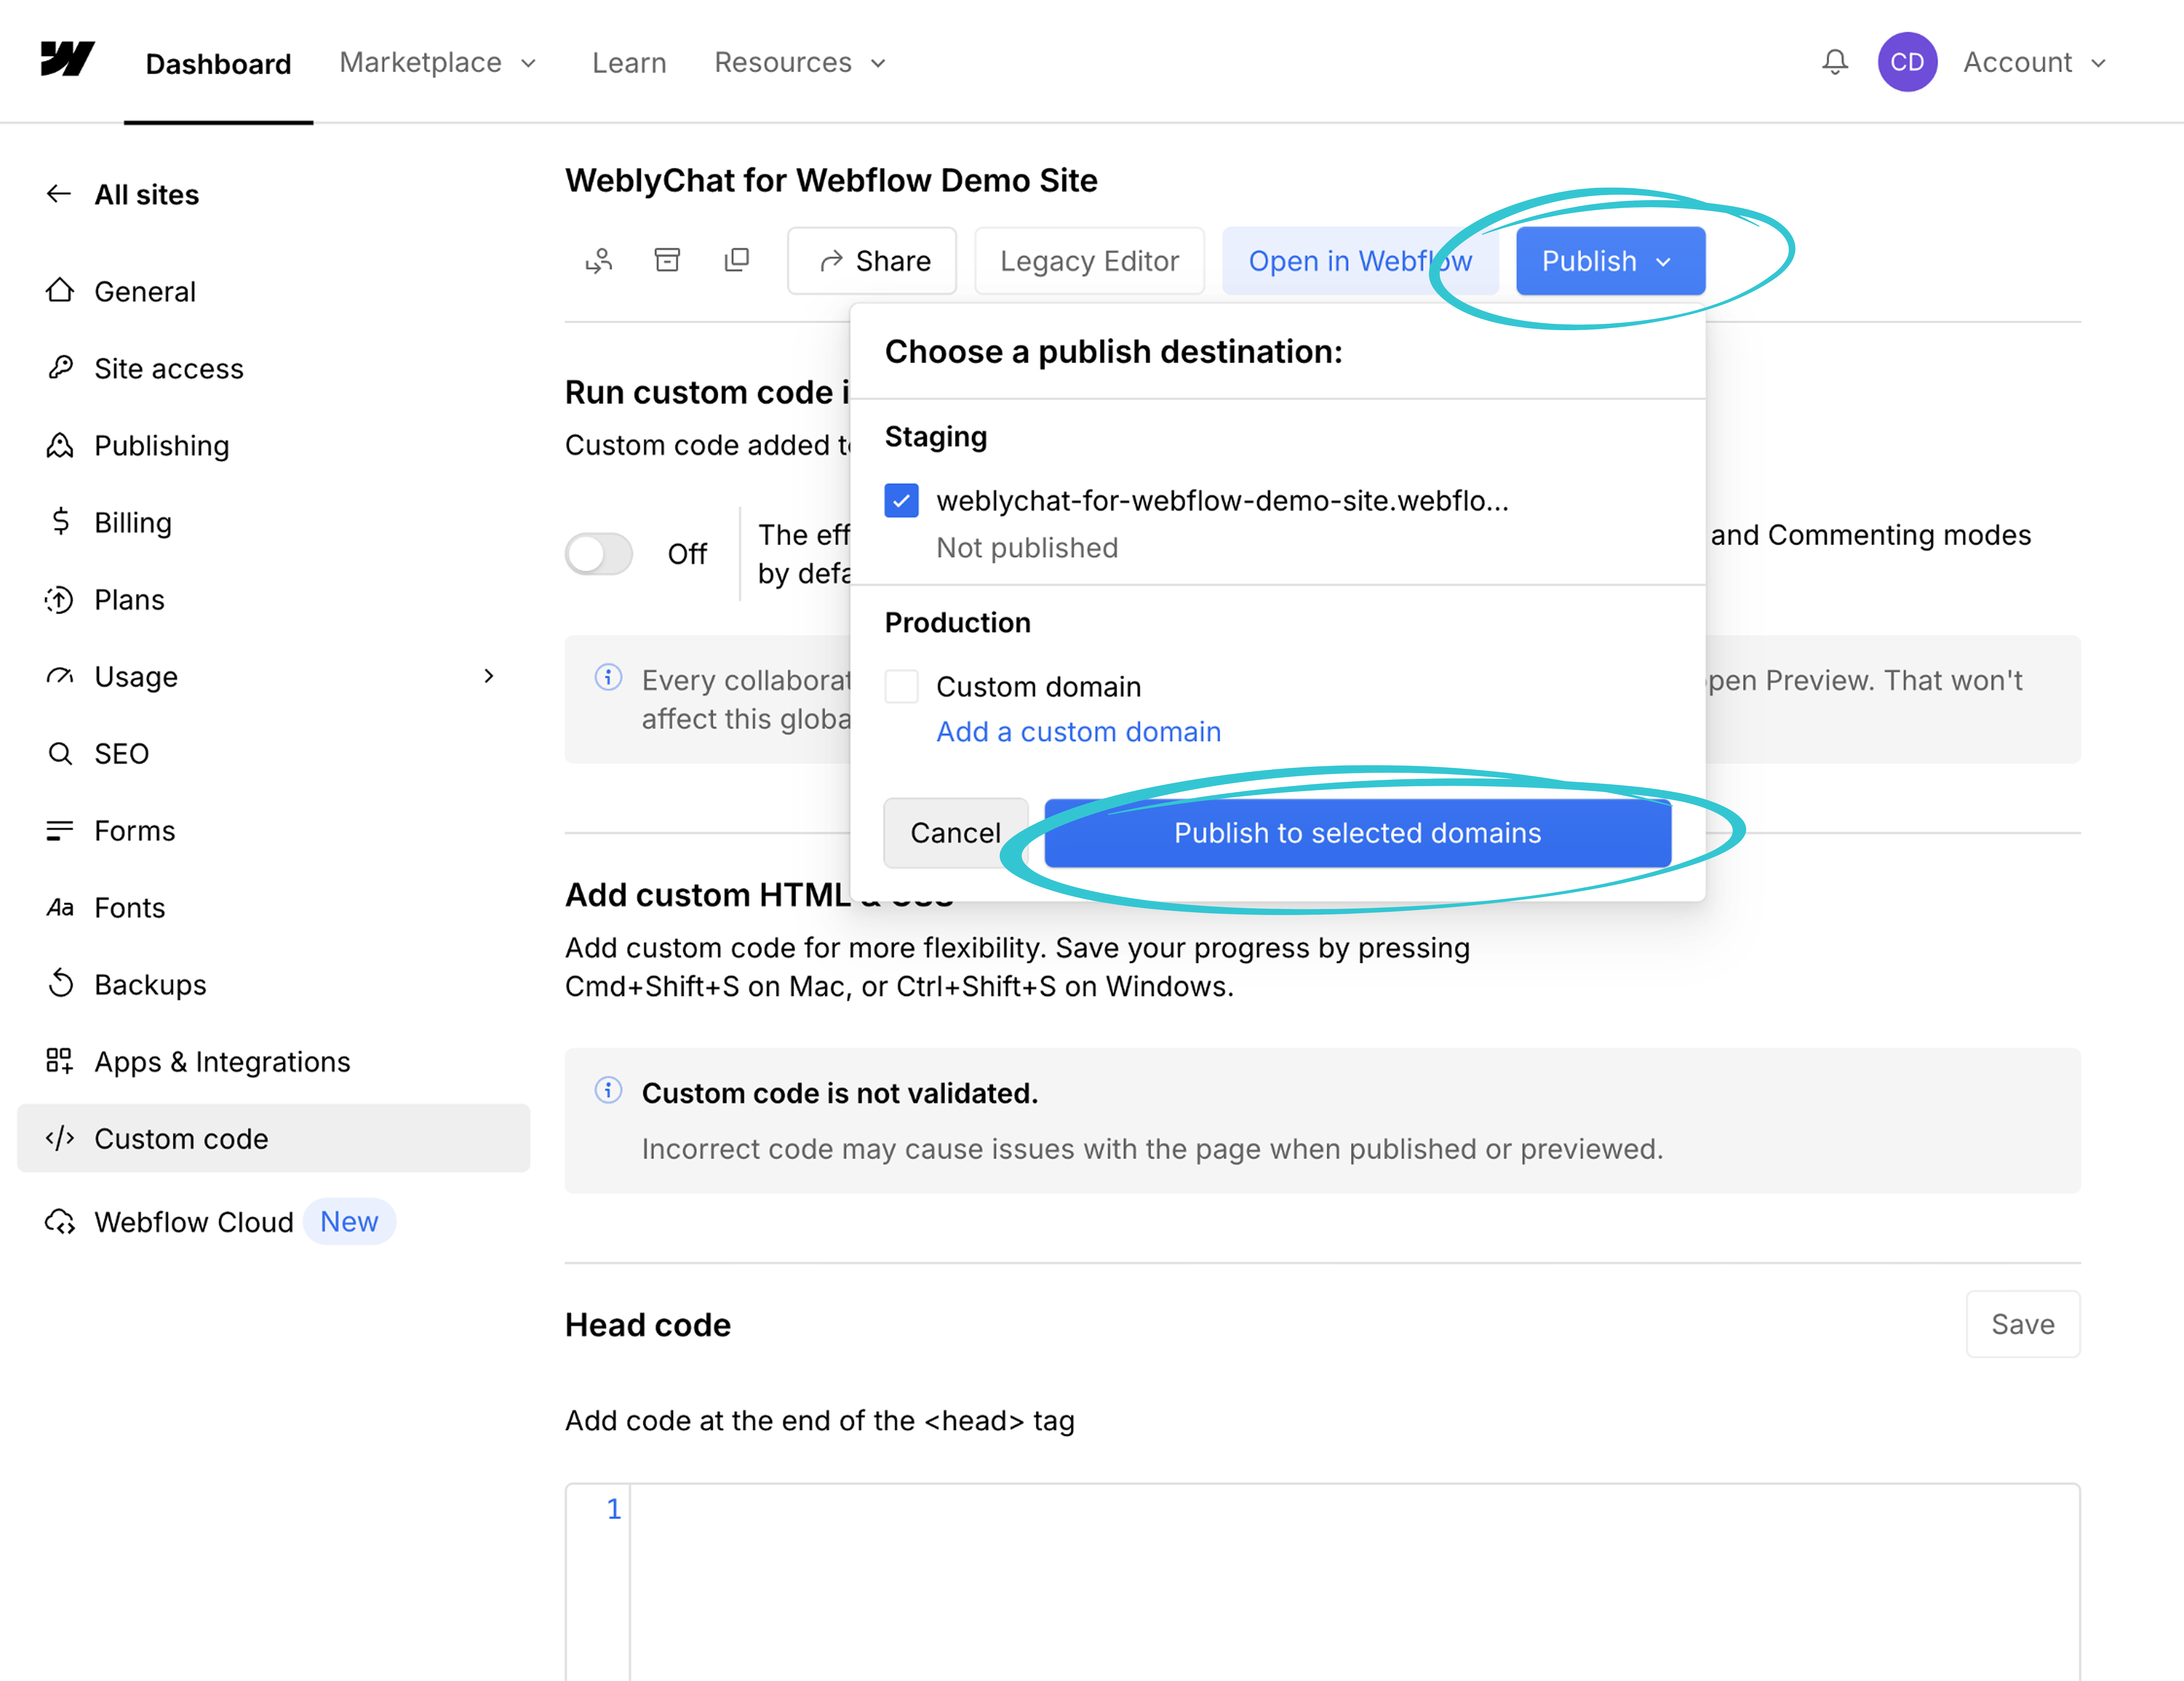
5. Scroll back to the top of the page and click the Publish button in the top-right corner. A dropdown will appear asking you to choose a publish destination. Select your domain and click Publish to selected domains.
6. You Are Live
Visit your live Webflow site and you should see the chatbot widget in the corner. Make sure you have clicked Publish before checking, as the chatbot will not appear until your site has been republished with the new code.
Any changes you make in your WeblyChat dashboard (colors, welcome message, training data) update instantly without touching Webflow again. You only paste the code once.
Ready to get started? Create your free WeblyChat account and have your Webflow chatbot live in under 5 minutes. The free plan includes 30 messages per month, enough to see your first real visitor conversations this week.
Why Webflow Site Owners Are Adding AI Chatbots
If you built your website on Webflow, you probably chose it because you wanted full design control without writing code from scratch. Adding a Webflow chatbot follows the same logic. You should not need a developer or a complex integration to give your visitors a better experience.
Most Webflow sites are built by designers, freelancers, agencies, and small business owners who are running lean. When a visitor lands on your site at 10 PM with a question about your services or pricing, you are probably not sitting at your desk waiting to respond. That visitor leaves, and you never know they were there.
An AI chatbot trained on your Webflow site answers the questions your visitors already have. Someone asks about your retainer pricing, and the chatbot pulls the answer from your pricing page. Someone wants to know your availability, and the chatbot responds instantly. This is not about replacing human conversation. It is about making sure every visitor gets a response, whether you are available or not.
Because WeblyChat uses Webflow's built-in Custom Code feature, there is nothing extra to maintain. No app updates, no marketplace dependencies, no compatibility issues when Webflow releases a new Designer version. You paste the code once, publish your site, and your Webflow chatbot works. Check your pricing options to find the plan that fits your site's traffic.
For more detailed setup guides and advanced features, visit our documentation.