
How to Add Chatbot to WordPress Website (Step-by-Step)
If you are searching for how to add chatbot to WordPress website, the good news is the setup is simple. You copy one embed code and paste it into your WordPress site, then your chatbot shows up on every page.
This guide walks you through the fastest, lowest-risk way to do it, plus the WordPress-specific gotchas that usually trip people up. If you are brand new to chatbots, start with our broader chatbot integration guide first.
If you want the click-by-click walkthrough with the full screenshot sequence, use the WordPress docs page: Add WeblyChat to WordPress.
What You Need Before You Add a Chatbot to WordPress
Before you integrate a chatbot with your WordPress site, you need:
- A chatbot to deploy. You should be able to copy an embed code from your chatbot provider.
- Admin access to WordPress. You need permission to install a plugin or edit site settings.
- A few minutes. Most setups take less than 5 minutes.
If you do not have a chatbot yet, you can build one with WeblyChat by training it on your website URL. New accounts start with a 14-day free trial, then stay on our free plan forever.
Step 1: Create Your Chatbot and Copy the Embed Code
Most people get stuck because they start inside WordPress first. Start with the chatbot.
In WeblyChat, the basic flow is:
- Create your account
- Add your website URL so the bot learns your content
- Customize your widget branding
- Copy your embed code from the Add to Site page
That embed code is what you will paste into WordPress.
Step 2: Install WPCode (The Safest Way to Add Chat Code)
There are a few ways to add scripts to WordPress. The cleanest method for most site owners is using WPCode, a free utility plugin that inserts code safely without editing theme files.
This approach is especially helpful if you are using a page builder like Elementor, Divi, or Gutenberg. It does not matter which theme you run.
WPCode vs Theme File Editor: which should you use?
If your goal is to add a chatbot to your WordPress site once and never think about it again, WPCode is usually the safer choice.
- WPCode (recommended): safer, updates do not overwrite your changes, easier to remove later.
- Theme File Editor (advanced): works, but theme updates can overwrite edits, and a bad paste in
footer.phpcan break the site.
Step 3: Paste the Chatbot Code Into Your WordPress Footer
Now we do the actual WordPress chatbot integration.
- In WordPress, go to Plugins, then Add New
- Search for WPCode and install it
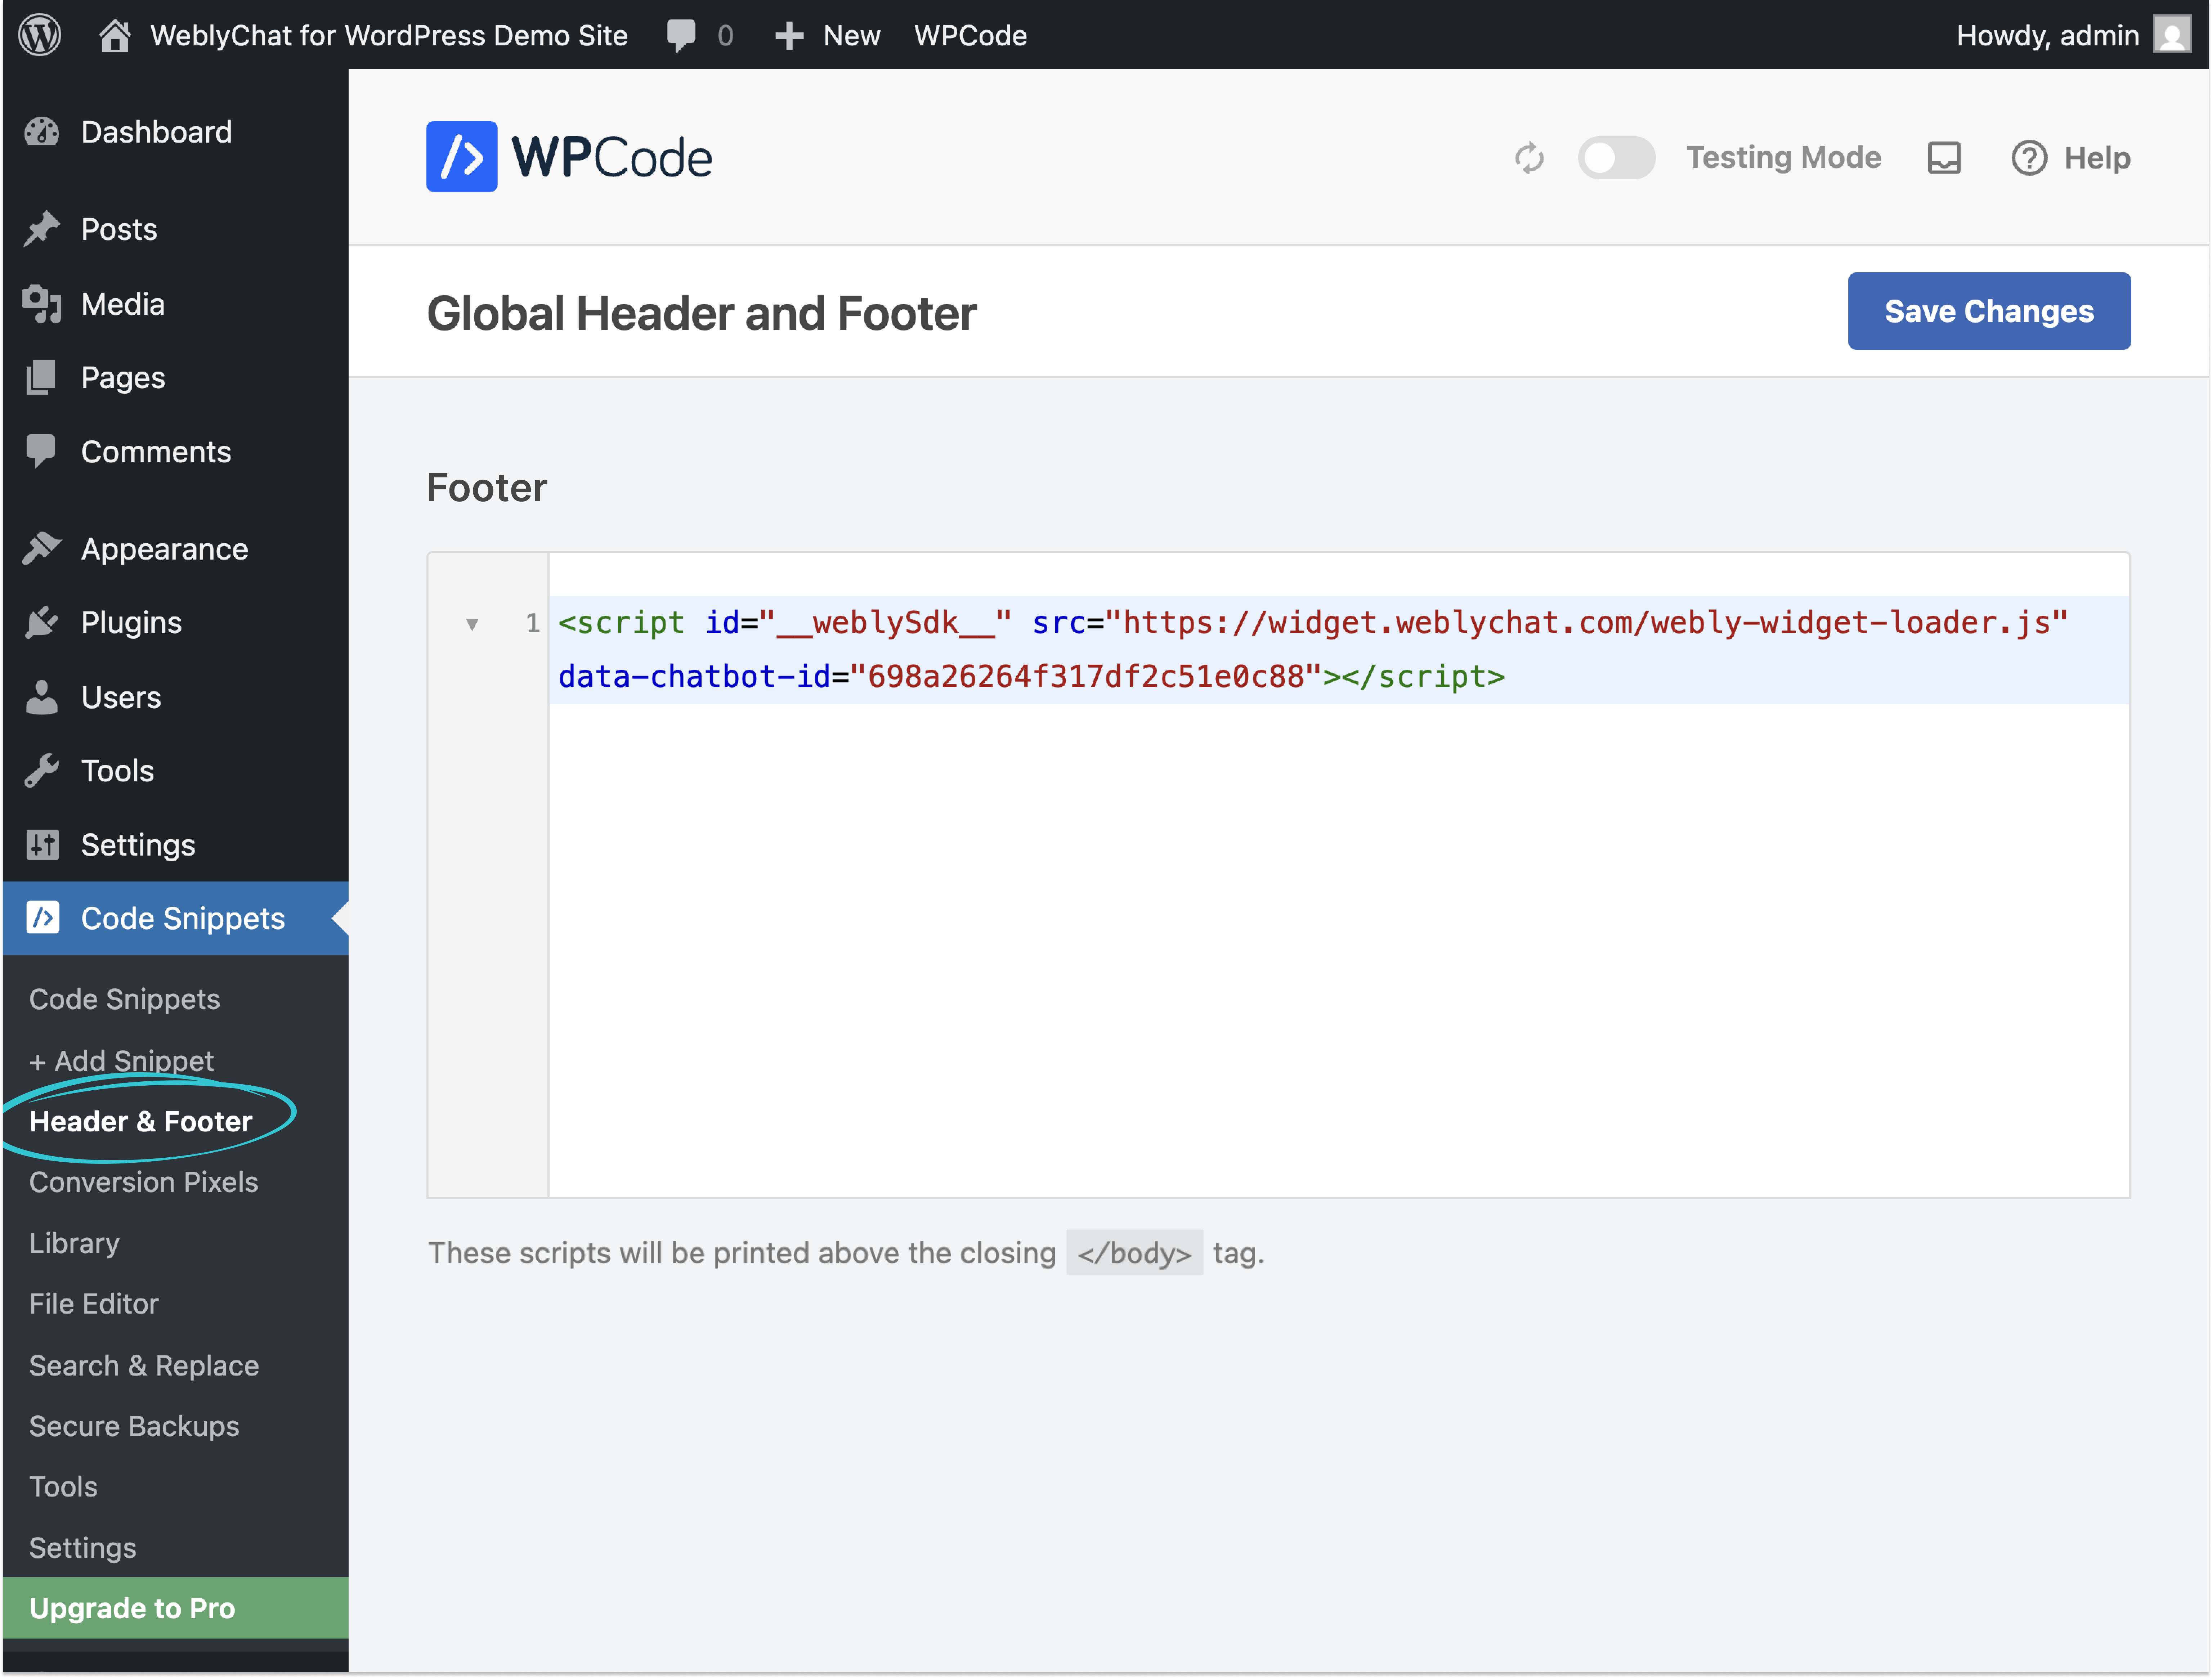
- Open Code Snippets, then Header & Footer
- Paste your chatbot embed code in the Footer section
- Click Save Changes
If you are trying to follow a tutorial that says you must install a heavy WordPress chatbot plugin, pause. An embed-based chatbot is usually lighter and avoids plugin conflicts.
Step 4: Test the Chatbot on Your Live WordPress Site
Open your WordPress site in a private browser window and look for the widget.
If it is not showing up, check these first:
- Caching: Clear your cache plugin and refresh.
- Theme optimizers: Some performance plugins delay scripts. Try disabling script delay for the chatbot domain.
- Wrong placement: Confirm you pasted into Footer or Body end, not the header.
WordPress.com vs WordPress.org: will this work on your plan?
If you are on a self-hosted WordPress.org site, you can install WPCode, paste the embed code, and you are done.
If you are on WordPress.com, the key question is whether your plan supports installing plugins. WordPress.com’s Business and Commerce plans include plugin support and advanced customization features. Lower-tier plans typically do not, which means you may not be able to use WPCode or add custom scripts the same way.
If you are unsure which WordPress you are on, check your admin URL. WordPress.com sites are usually managed through WordPress.com, while self-hosted WordPress.org sites are managed through your hosting provider.
How to Add an AI Chatbot on a WordPress Website (Not Just a Chat Widget)
A basic chat widget is just a message box. An AI chatbot is different because it can answer questions using your actual content.
To add an AI chatbot on WordPress, make sure your bot is trained on:
- Your homepage and service pages
- Your pricing page
- Your FAQ pages
- Your blog posts
With WeblyChat, training on your URL is the primary method. After that, you can also upload files or add custom Q&As if you want tighter answers.
If you want the full product and setup overview, the fastest path is our dedicated WordPress chatbot page.
Troubleshooting: when the chatbot does not show up
If you pasted the code and nothing appears, it is usually one of these:
- Caching plugins: Clear your cache plugin and your host cache (if your host has one), then hard refresh.
- Script delay optimizers: Some performance plugins delay JavaScript. Exclude the chatbot script from delay if it is being deferred.
- Cookie/consent blockers: If you use a consent tool, confirm it is not blocking the widget script.
- Wrong environment: Make sure you are testing the live site (not only the editor preview) and that you saved changes.
Why Embed Code Beats a Traditional WordPress Chatbot Plugin
You might see searches like “integrate chatbot creator with AI into WordPress”. People usually mean, “How do I connect an AI chatbot builder to my WordPress site so it can answer questions automatically?” They often end up installing multiple plugins, which tends to create three problems:
- More plugin updates and conflicts
- More database and server overhead
- More setup complexity
An embed code approach is simple. It is one snippet, pasted once.
Post-install checklist (the part most people skip)
Once your widget is live, you will get better results if you do a quick pass on setup quality:
- Ask 5 real visitor questions (pricing, hours, services, refund policy, booking).
- Add suggested prompts that match the top questions your visitors ask.
- Link to the right pages (pricing page, contact page, booking link).
- Re-crawl after major updates. If you change pricing or services, update the bot’s knowledge. Paid plans can auto-crawl on a schedule. Free plan users re-crawl manually.
Next Steps
Once your bot is live, focus on the parts that actually improve conversions:
- Update your welcome message
- Add suggested prompts that match your visitors’ top questions
- Re-crawl your site when you publish important changes
For advanced guidance and troubleshooting, visit our documentation.
Ready to add a chatbot to WordPress today? If you can copy and paste, you can do this in under 5 minutes. Try WeblyChat free →


